1. Assign employees to departments:
First of all, employees that are to be covered by the supplier visibility filter must be assigned to their corresponding departments within your company. To do this, as an administrator you can assign the corresponding department, e.g. Sales, in the profile of the respective employee:
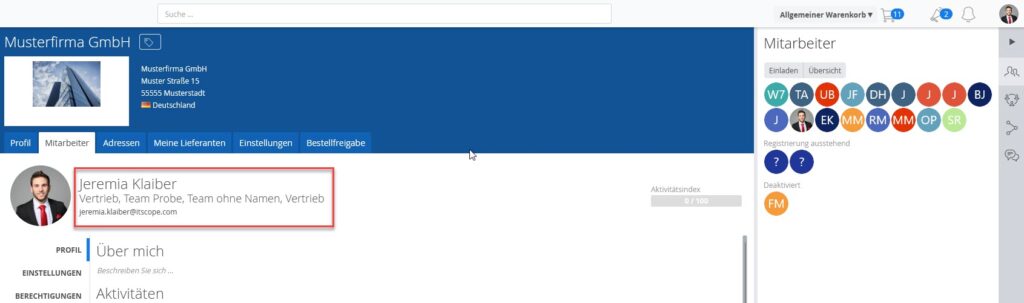
Select the department for which you want to specify the filter later on.

2. Define ‘tags’:
To use a tag as a filter for a supplier, you must first define it. ‘Favourite‘ is used here as an example tag. To do this, you must tag the desired supplier, e.g. Action, Also, Tech Data or Ingram, as follows:
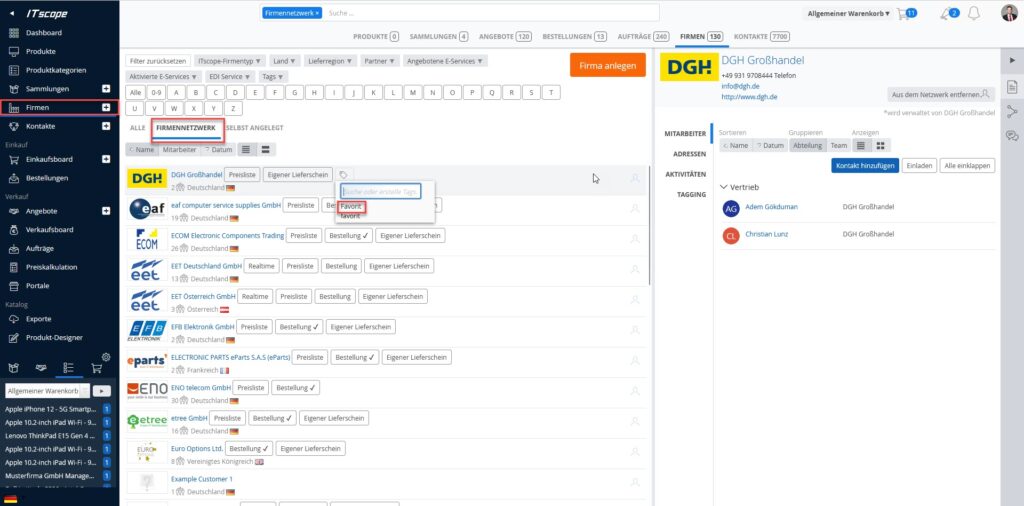
Nachdem Sie alle Lieferanten, welche Sie für eine Ihrer Abteilungen filtern möchten entsprechend gekennzeichnet haben, folgt der nächste Schritt, um die Filterfunktion bei der Produktansicht anzeigen zu lassen.
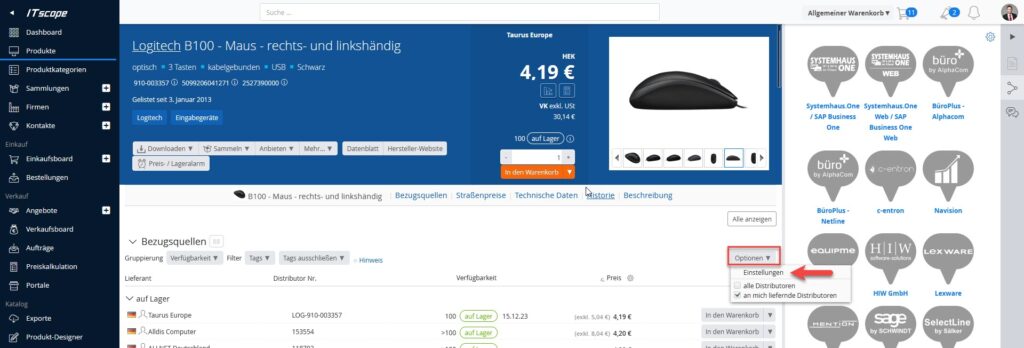
3. Open up any product page:
Open up a product page of your choice. In the product view, go to ‘Options‘ on the right and open the settings:
4. Set source of supply filters for each department
The following window will open:
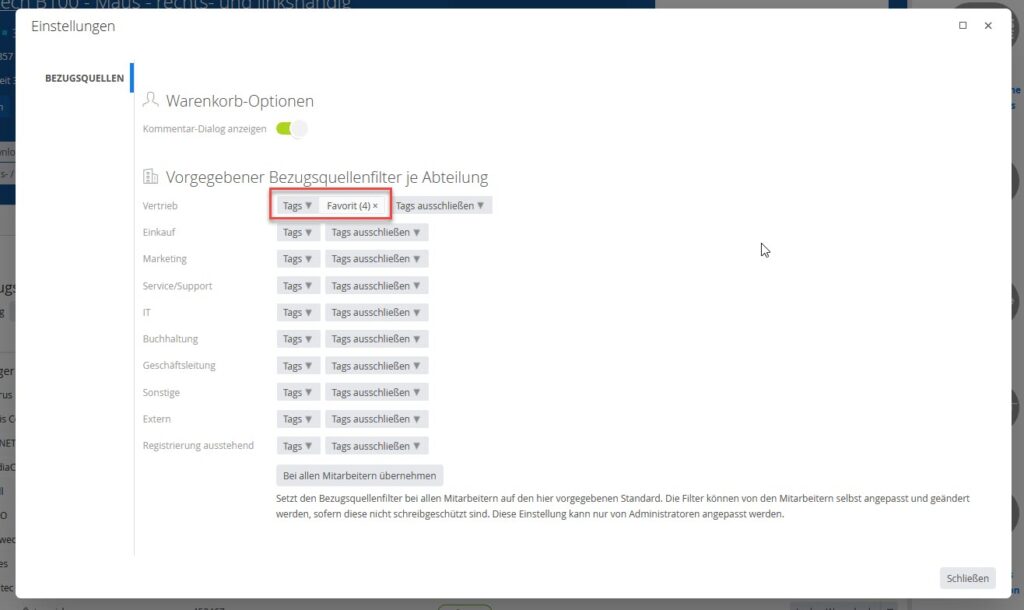
As an administrator, you can now define which tag should be defined as the default for which department. In this example, Sales is given the tag ‘Favourite‘, so that only sources of supply (suppliers) that have been marked with the tag ‘Favourite‘ are displayed to Sales.
5. Activate write protection for filters:
In order to have the created filters write-protected, a short email must be sent to support@itscope.de. The ITscope support team will then make sure that filters/tags can only be edited and reset by you as an administrator.