This article is intended for administrators of the ITscope account.
Some emails from ITscope will be sent on your behalf, such as for colleague invitations or for quotes. In order to prevent emails occasionally ending up in the spam folder, and to hide ITscope as the sender of the email, you have two options:
- You can authenticate your domain to enable sending through ITscope.
- You can let ITscope send emails through your own mail server.
These settings are located in the ‘Email’ section of the account configuration area:
https://www.itscope.com/red/app#companies/account/-/email
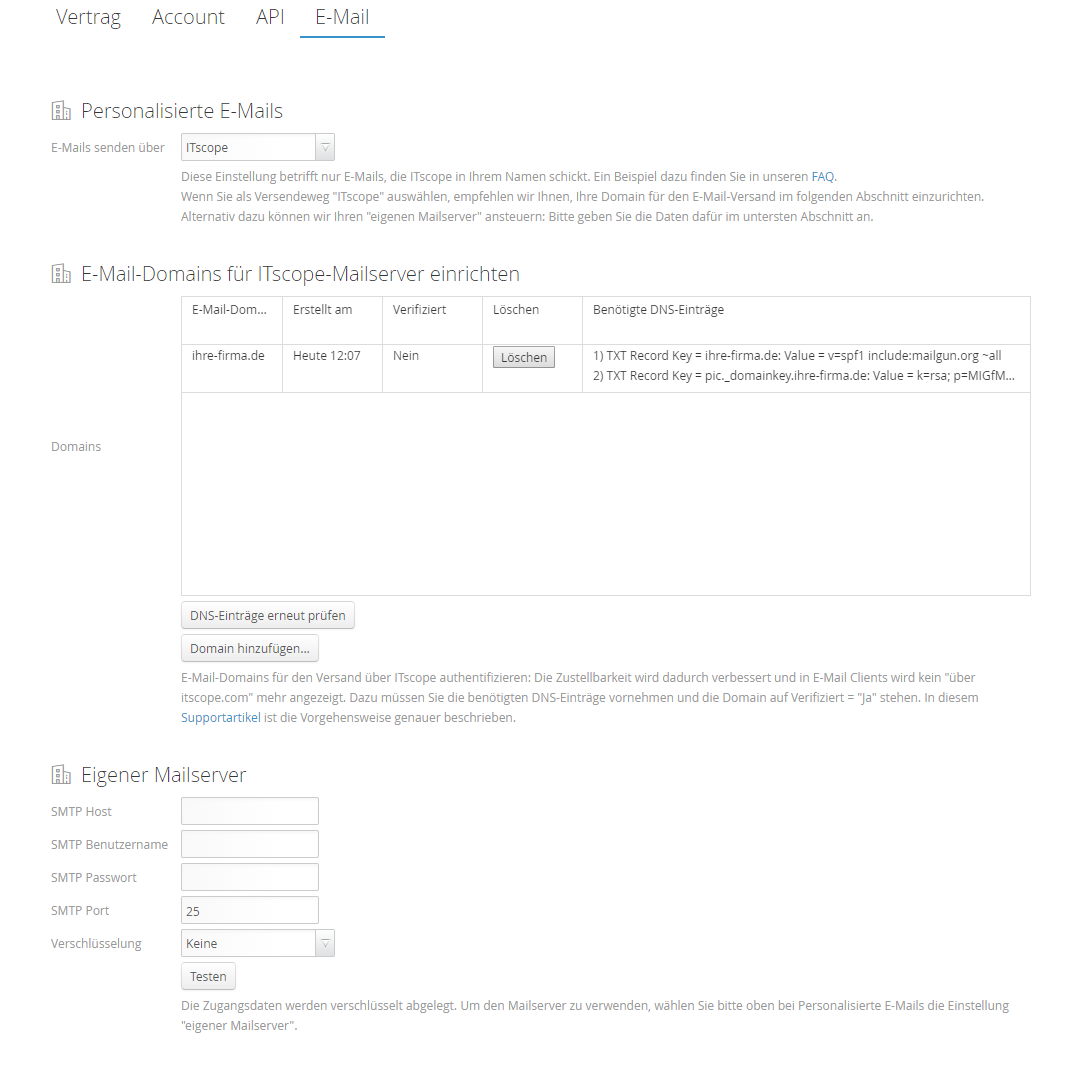
Set up your own domain
If you do not want to use your own mail server, and want to continue to send everything via ITscope, then it is recommended to authorise ITscope to send emails on behalf of your domain via DNS settings. This is done by means of SPF and DKIM TXT entries for all domains from which you want to send via ITscope (the login aliases of your employees).
ITscope uses https://www.Mailgun.com as the email provider, in order to ensure that the technical architecture is state of the art and good deliverability results can be achieved.
To get the DNS entries that are required, select ‘Add domain’ in the account email section and enter your email domain. For example, if your employees log in with email addresses of the form ’employee@your-company.com’, then you should enter ‘your-company.com’ as the domain.
Then you will obtain two entries,
for example
For SPF: DNS TXT entry: key=your-company.com
Value: v=spf1 include:mailgun.org ~all
(Note: if there is already an SPF entry for your domain, e.g. for Gmail or Outlook.com, you can simply incorporate the include:mailgun.org into the existing one, e.g.: ‘v=spf1 include:mailgun.org include:_spf.google.com include:spf.crsend.com ~all’)
For DKIM: DNS TXT entry: key=mx._domainkey.your-company.com and value=k=rsa; p=….
If you are unable to make the entries yourself, please forward the data to the person responsible for your Internet domain. If the entry does not take effect, emails sent in your name will be displayed as being ‘sent via itscope.com’, for example. The settings only become active when you make the entries, then select ‘Recheck DNS entries’ and if on ITscope the domain is set to ‘Verified = yes’.
Security: mailgun.org has a very large IP address range for sending emails, which might be perceived as a security issue at first. However, the domain has to be authenticated via SPF and DKIM, which can only be achieved in cooperation between the domain owner and ITscope. Otherwise, someone would not have the right to send emails via Mailgun. Furthermore, the email reputation is secured by the fact that ITscope uses a dedicated IP address at Mailgun to send transactional emails, and this IP address cannot be shared. Example for your-company.com (not yet verified):
Configure your own mail server
Alternatively, you can specify the SMTP access data for one of your mail servers via which ITscope should send emails. In this case you do not have to set up your own domain, but you have to select the option ‘own mail server’ for ‘Send emails via’:
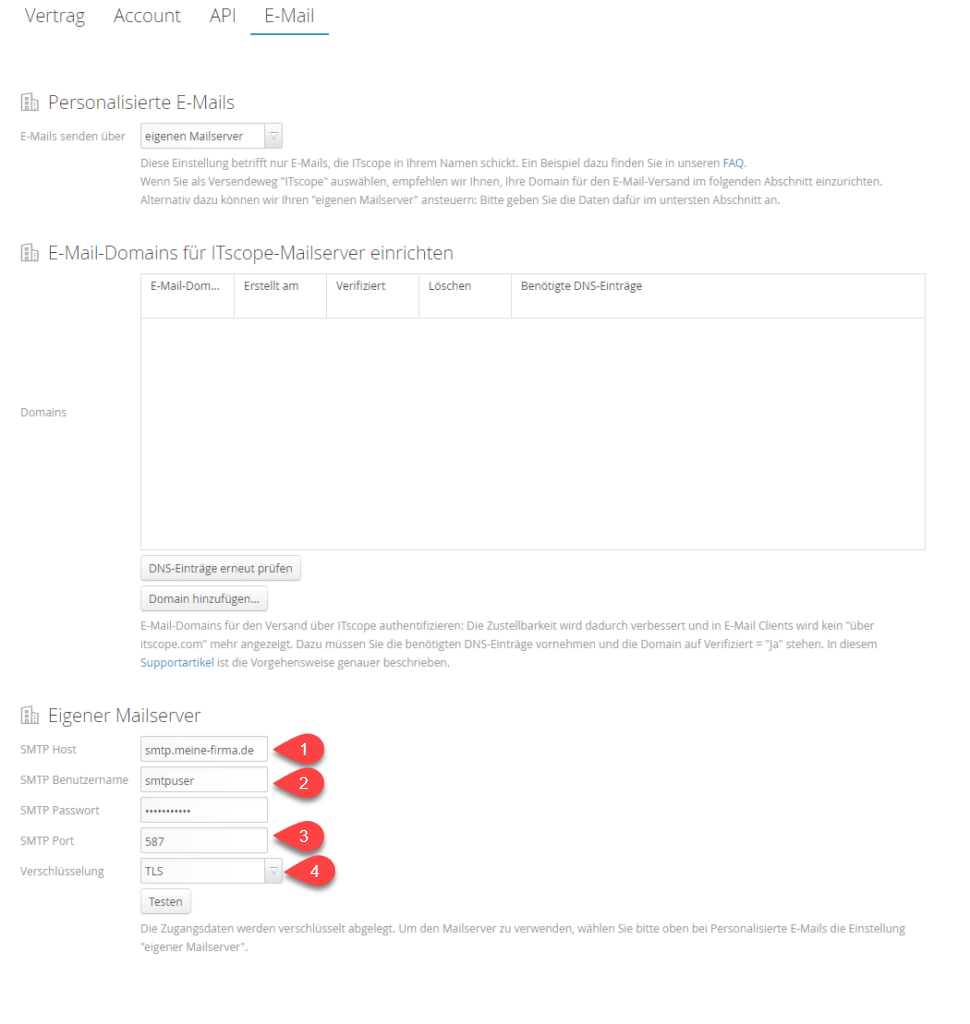
- As SMTP Host, the specification of your SMTP server provider is required. Example: for Office365, your SMTP host would be: smtp.office365.com
- The SMTP username refers to an informal name that you define to identify yourself to the server. This can also be a mail address. Example: example@systemhouse.co.uk
- The port specifies which encryption format is used to communicate with the mail server. By default, 25/TCP (587/TCP) or 456/TCP is used for SSL/TLS encryption.
For the Office365 example, use port 587. - The encryption specifies the connection security that is to be used by the SMTP server for emails.
For Office365, use TLS.
Under the following guide entry, you will find the current IP addresses/IP ranges that you must whitelist in order to allow ITscope emails to be sent.
If you have any difficulties setting up your own mail server, our support team will be happy to help you under: support@itscope.com.
Mail configuration for Office365 with SMTP relay
This article is adapted from Microsoft’s best of practices for mail configuration with Office365. See: configure a connector to send mail using Microsoft 365 or Office 365 SMTP relay.
This mail configuration option for Office365 is required if:
- An SMTP client transmission is incompatible with your business requirements or with your device
- Direct sending cannot be used as you need to send emails to external recipients (this case applies to B2B suite operators)
A step-by-step guide:
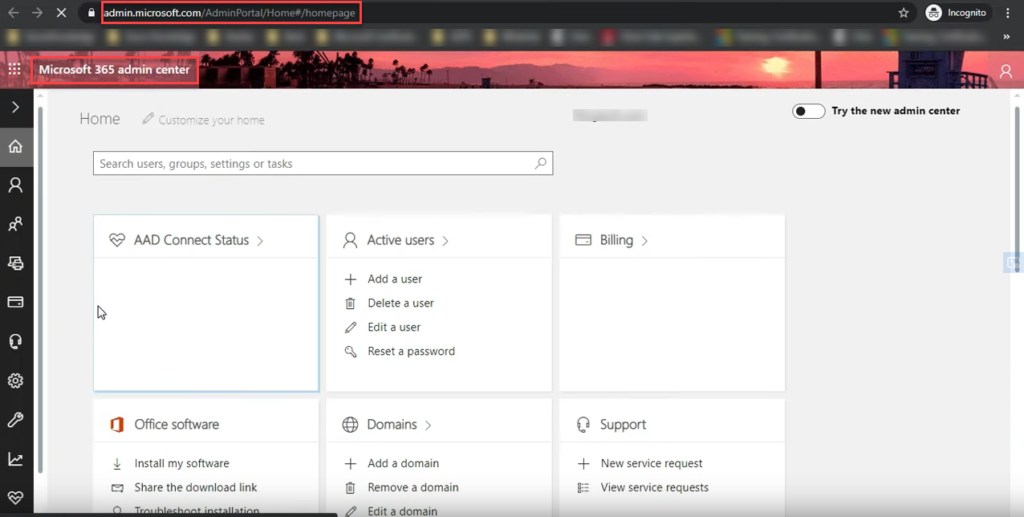
Part 1 in the Office365 Admin Center
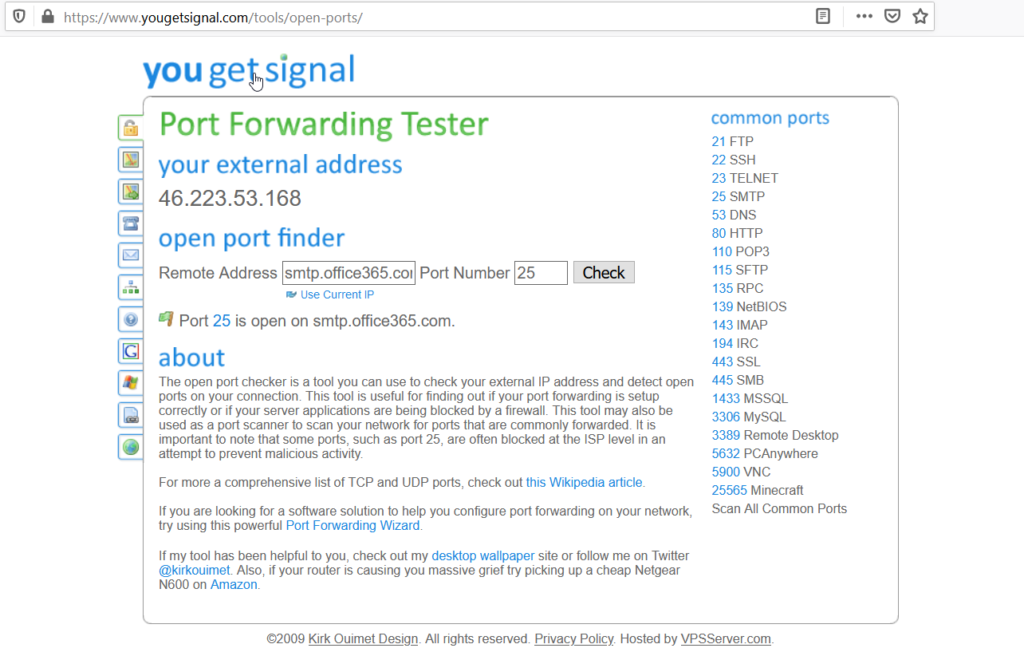
- Make sure that port 25 of your mail server (smtp.office365.com) is open for your IP. You can check this on different websites provided for this purpose.
2. Go to your Microsoft Office365 Admin Center.
3. Navigate to the domains via your settings: Settings > Domains.
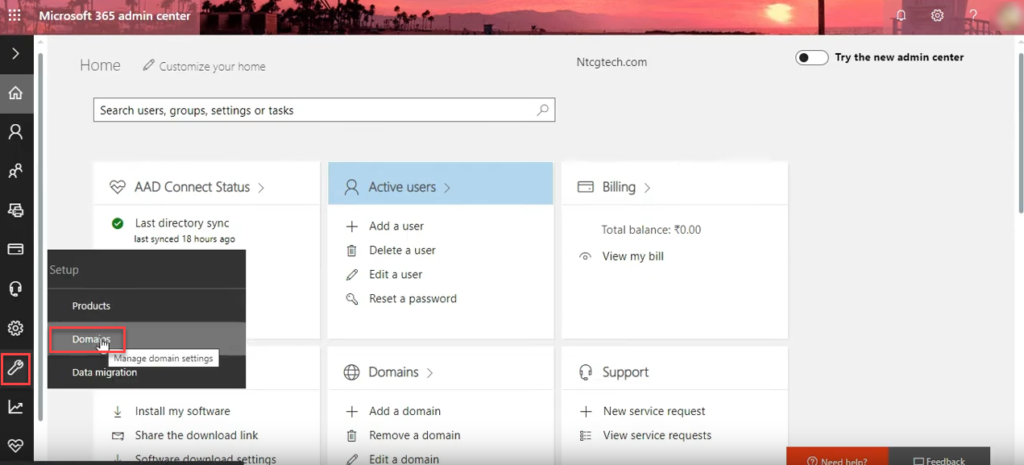
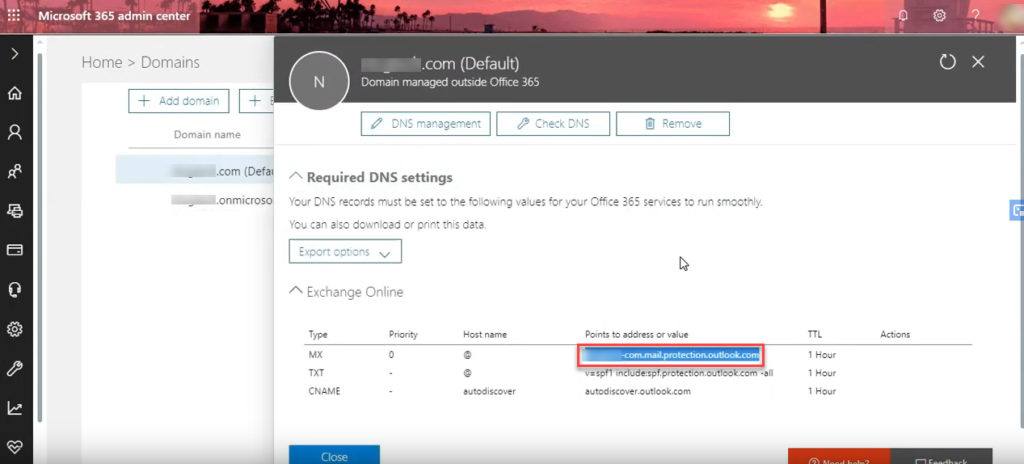
4. In your domain settings, open your default domain and save the MX address in a separate document. For example, you could do this using the editor. This will be needed again for later steps.
Your address could look like this: example-com.mail.protection.outlook.com
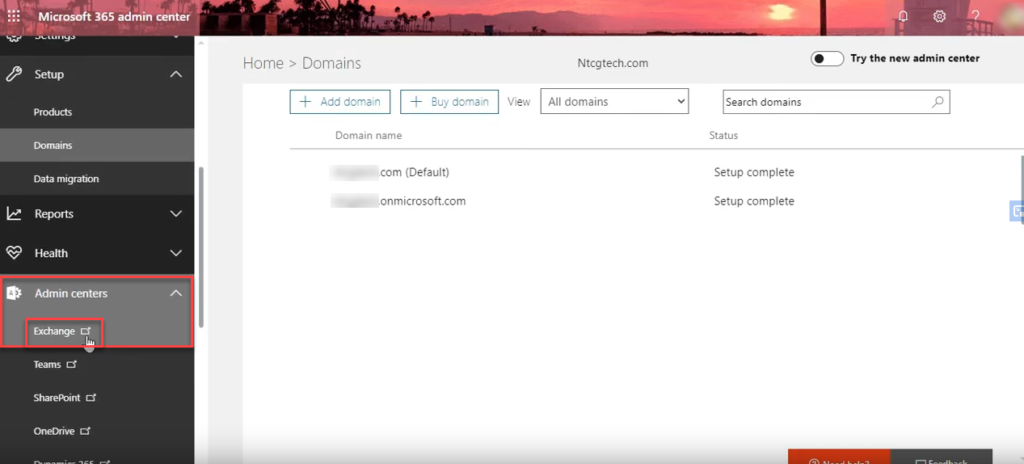
5. Now switch to the Admin Center Exchange section of the Admin Centre. Here you can manage your mail traffic.
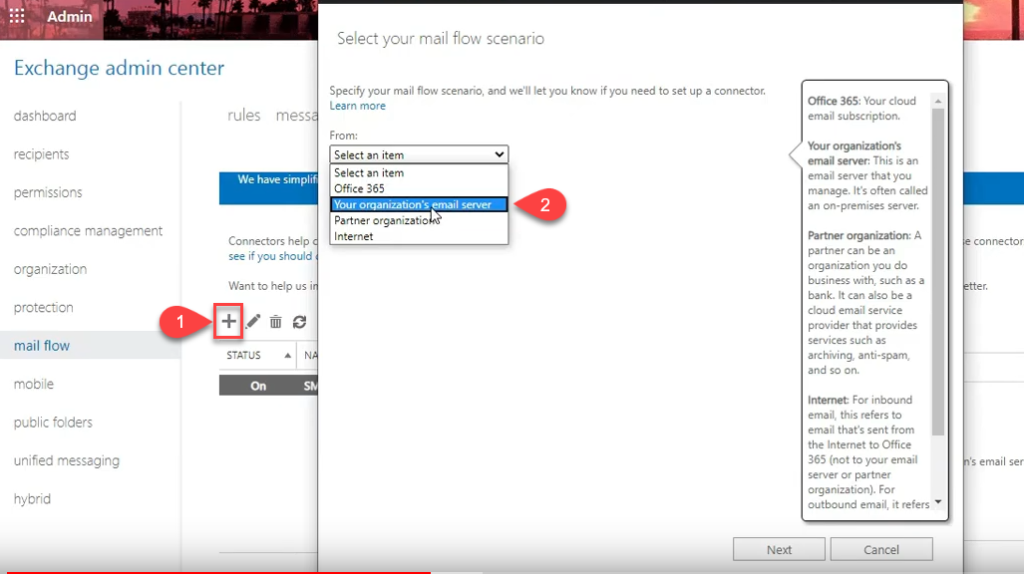
6. To do this, navigate to the Mailflow and to the Connectors section. By default, an empty field should appear here.
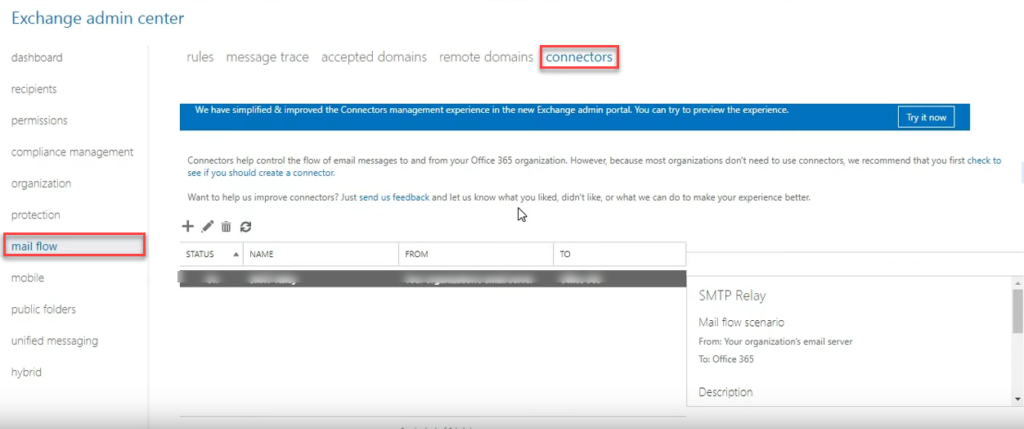
7. Next, add a new connector and select the option Your organisation’s email server for the From: section and Office365 for the To: section.
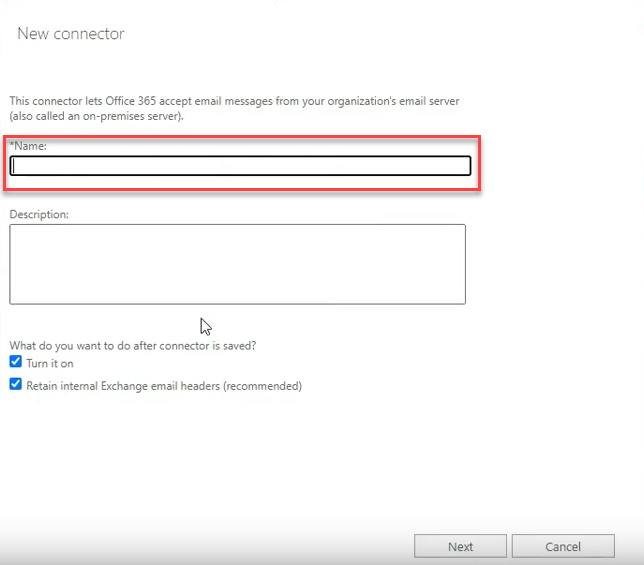
8. Click Next and give your new connector a name. Select the option Retain internal Exchange email and then click Next.
9. In the following window, select the second option and add your IP address or your IP range. Multiple IP addresses can also be added.

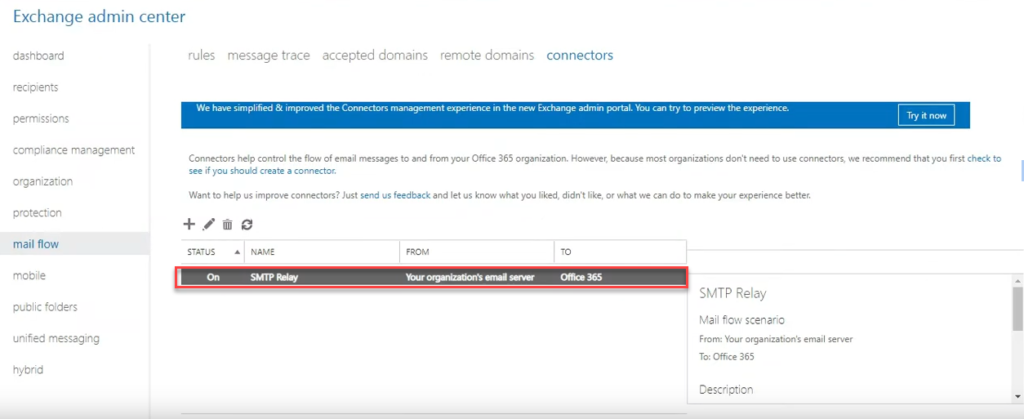
10. The SMTP relay is now configured and set up. The first part of your configuration is complete.
Once the SMTP relay is set up for your Office365, you will need to configure the settings with your host/provider where you have hosted your domain.
Part 2: setting up with your domain host/provider
- Open the page of your provider and log in to your account
- Navigate to your DNS Management Center
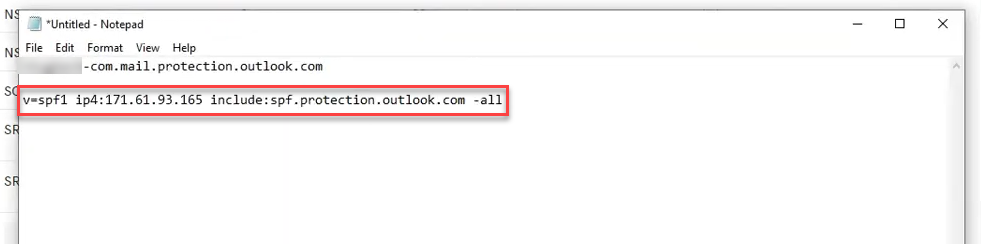
- Edit your SPF entry. This entry must contain your public IP address. The finished string should look something like this:
v=spf1 ip4:10.5.3.2 include:spf.protection.outlook.com ~all. Here, ‘10.5.3.’ indicates your public IP address. This ensures that your emails do not end up in the spam folder or are blocked. This could look like this:
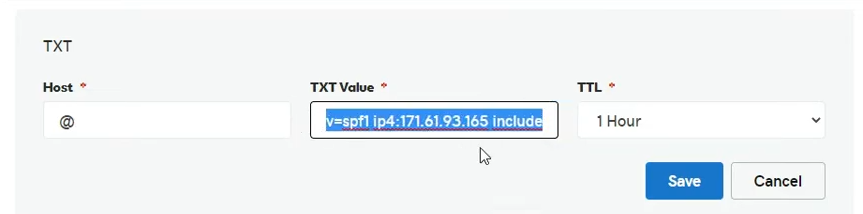
The TXT value should have the following content:
4. To finish, find the entry for Server or Smarthost in the settings. Then enter the POINTS TO ADDRESS value of the MX record, example-com.mail.protectionoutlook.com, which you saved in a separate document in the first part of the setup.
Afterwards, the sending of emails via the SMTP relay can be tested.