If you would like to use Single Sign-On (SSO) for portals in conjunction with Azure Active Directory (AD), please contact your ITscope representative.
The following documentation describes how to create and set up an enterprise application in Azure AD to enable SSO access to a B2B Suite portal.
Create enterprise application
Navigate to the overview page of all enterprise applications in Azure AD. Alternatively, you can also use the following link: https://aad.portal.azure.com/#blade/Microsoft_AAD_IAM/StartboardApplicationsMenuBlade/AllApps/menuId/

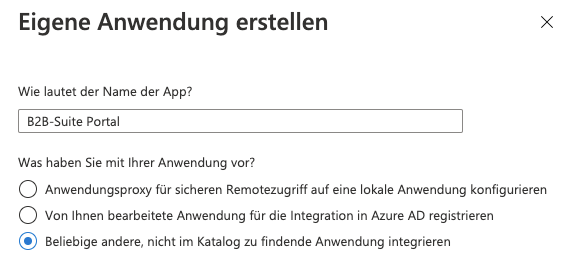
Select ‘Create new application’ and in the following step select ‘Create own application’ in the upper menu. In the new panel that opens on the right, define a name for the new application and select ‘Integrate any other application not found in the catalogue’ as the purpose. The application can then be created via the ‘Create’ button at the bottom.
Configure enterprise application for SAML SSO
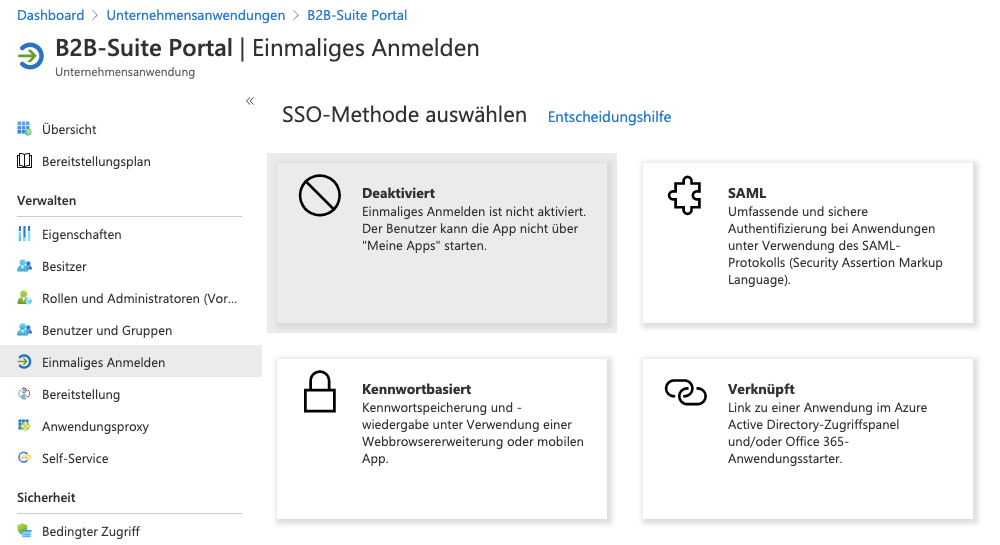
Open the page of the enterprise application you just created and select ‘Single Sign-On’ in the left sidebar and select ‘SAML’ as the SSO method.
The SSO login must then be set up with SAML in the overview that can now be seen.
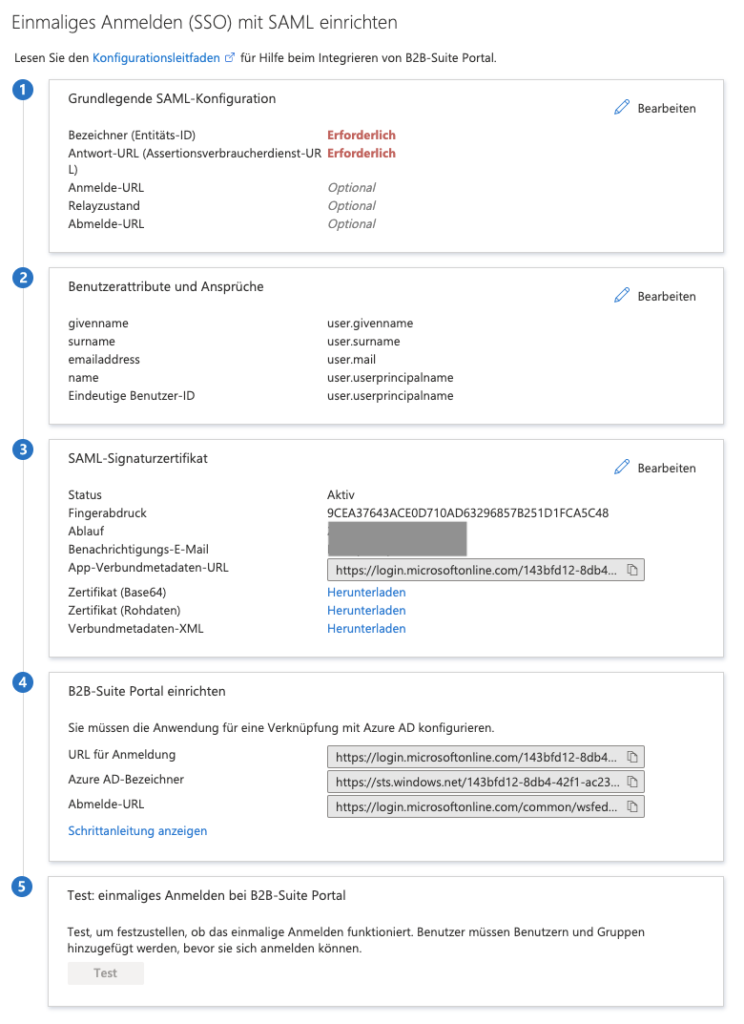
Under point (1) ‘Basic SAML Configuration’, click ‘Edit’ and enter the following URL: ‘https://<portal-domain>/saml/metadata’ for ‘Identifier (Entity ID)’. Then enter the following URL: ‘https://<portal-domain>/red/samlacs’ for ‘Response URL (Assertion Consumer Service URL)’. Save this configuration.
Under point (3) ‘SAML signature certificate’, click ‘Edit’ and select ‘Sign SAML response and assertion’ as the ‘Signature option’ and then save this change.
Now you need to copy or download the following details and send them to your ITscope contact person:
- Point (3) ‘SAML signature certificate’
- Fingerprint
- App Composite Metadata URL
- Certificate (Base64)
- Point (4) ‘Set up B2B Suite Portal’
- URL for registration
- Azure AD identifier
- Logout URL
As soon as these details are available to ITscope, the set-up will be initiated and after receiving feedback from the contact person, the integration can be tested under point (5).
To initiate the SSO login, the following URL has to be accessed: https://<portal-domain>/saml/login